Joint Venture Accounting
Joint Interest Billing Reporting
- To create a JIB Report, log in to the ERP with a user account that has access to the JVA module
- Open the JVA module and under Reporting choose JIB/JIBE
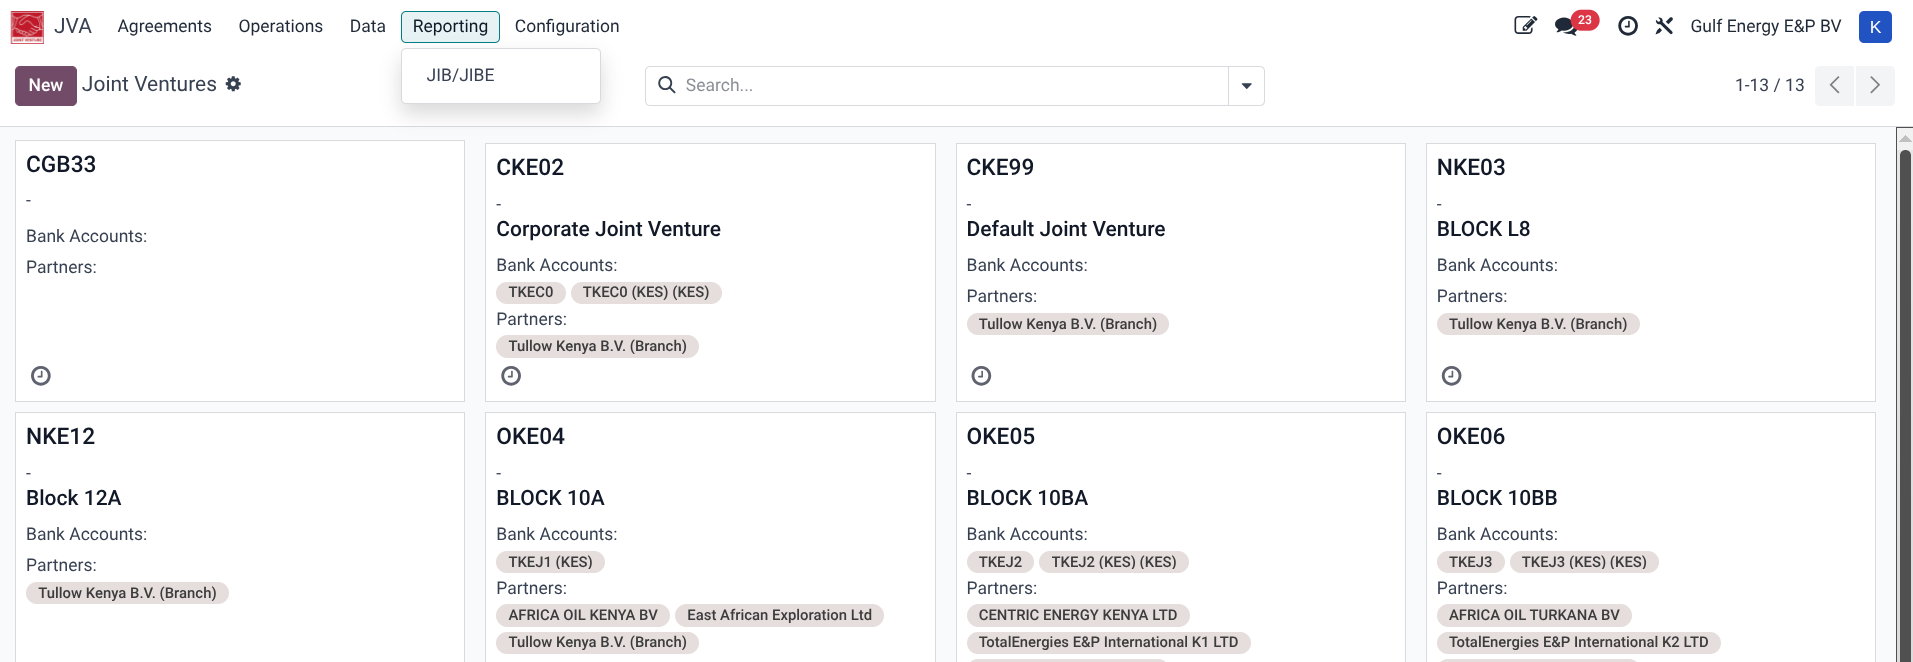
- Click the New button to create a new report and fill in the required details
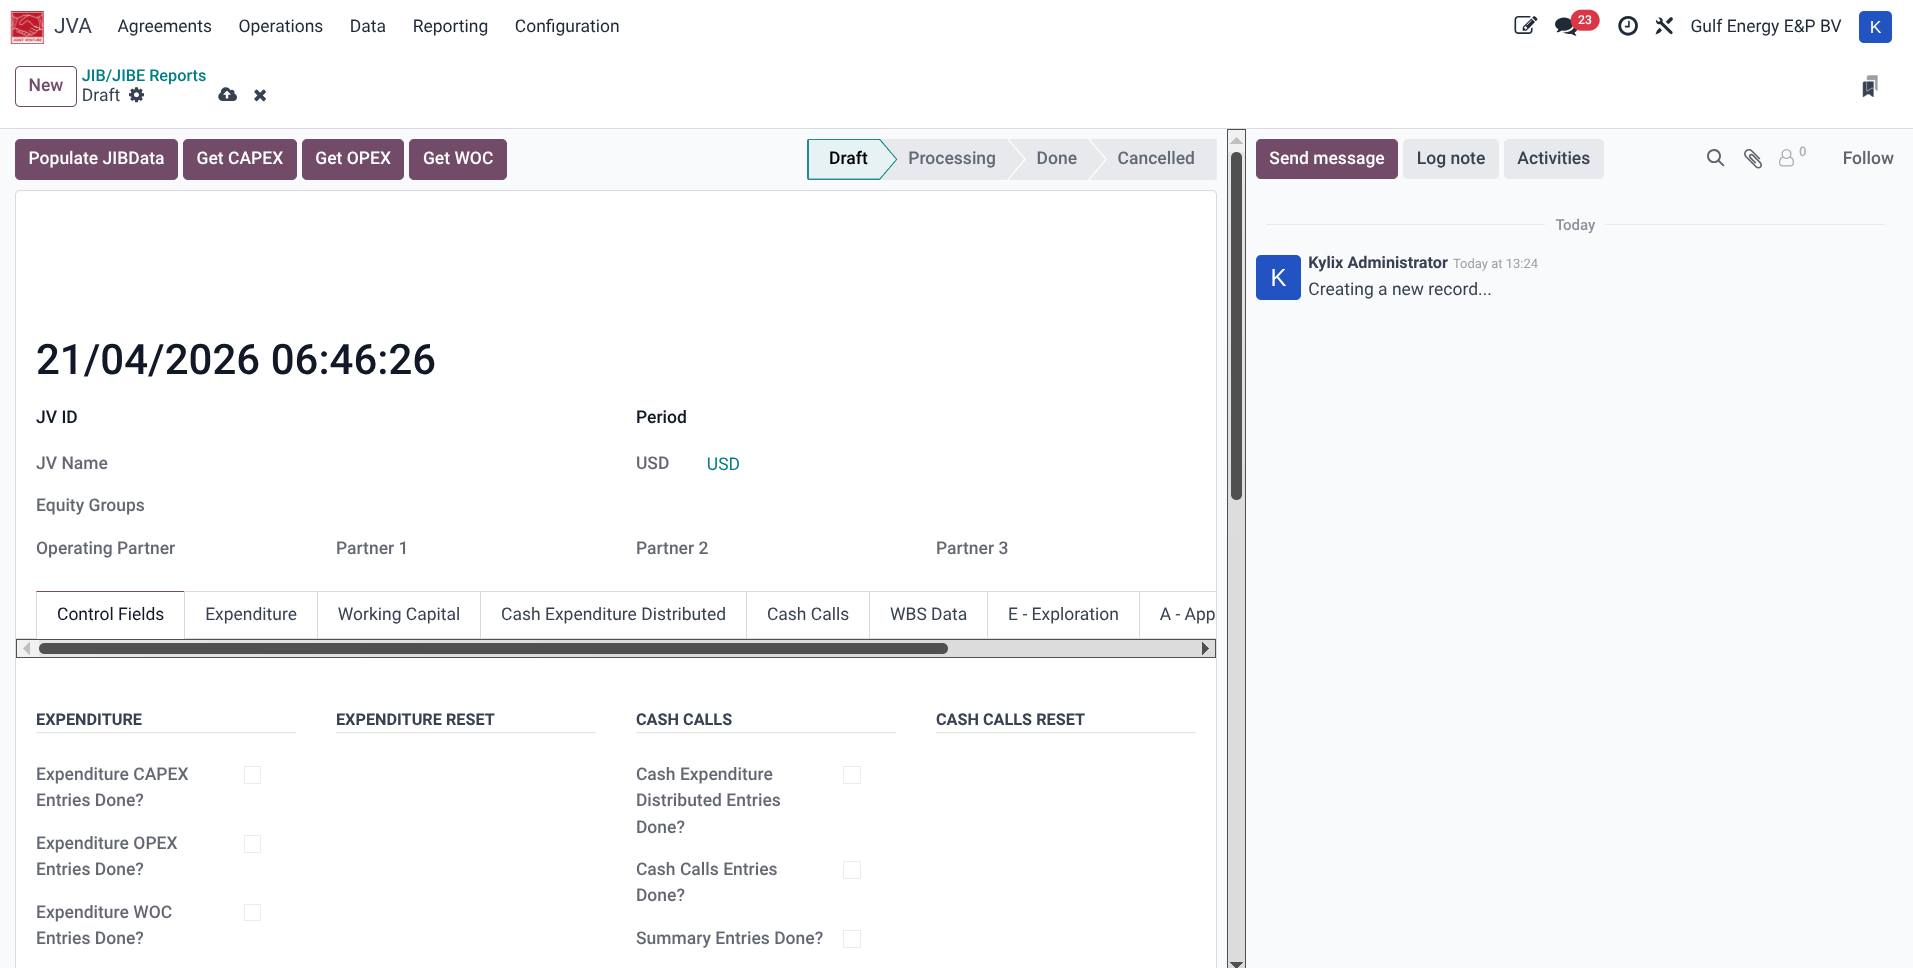
- JV ID: Select the Joint Venture that you are creating the report
- Period: Select the period of the report
- All remaining fields will be autopopulated
- Save the report, then click the button Populate JibData
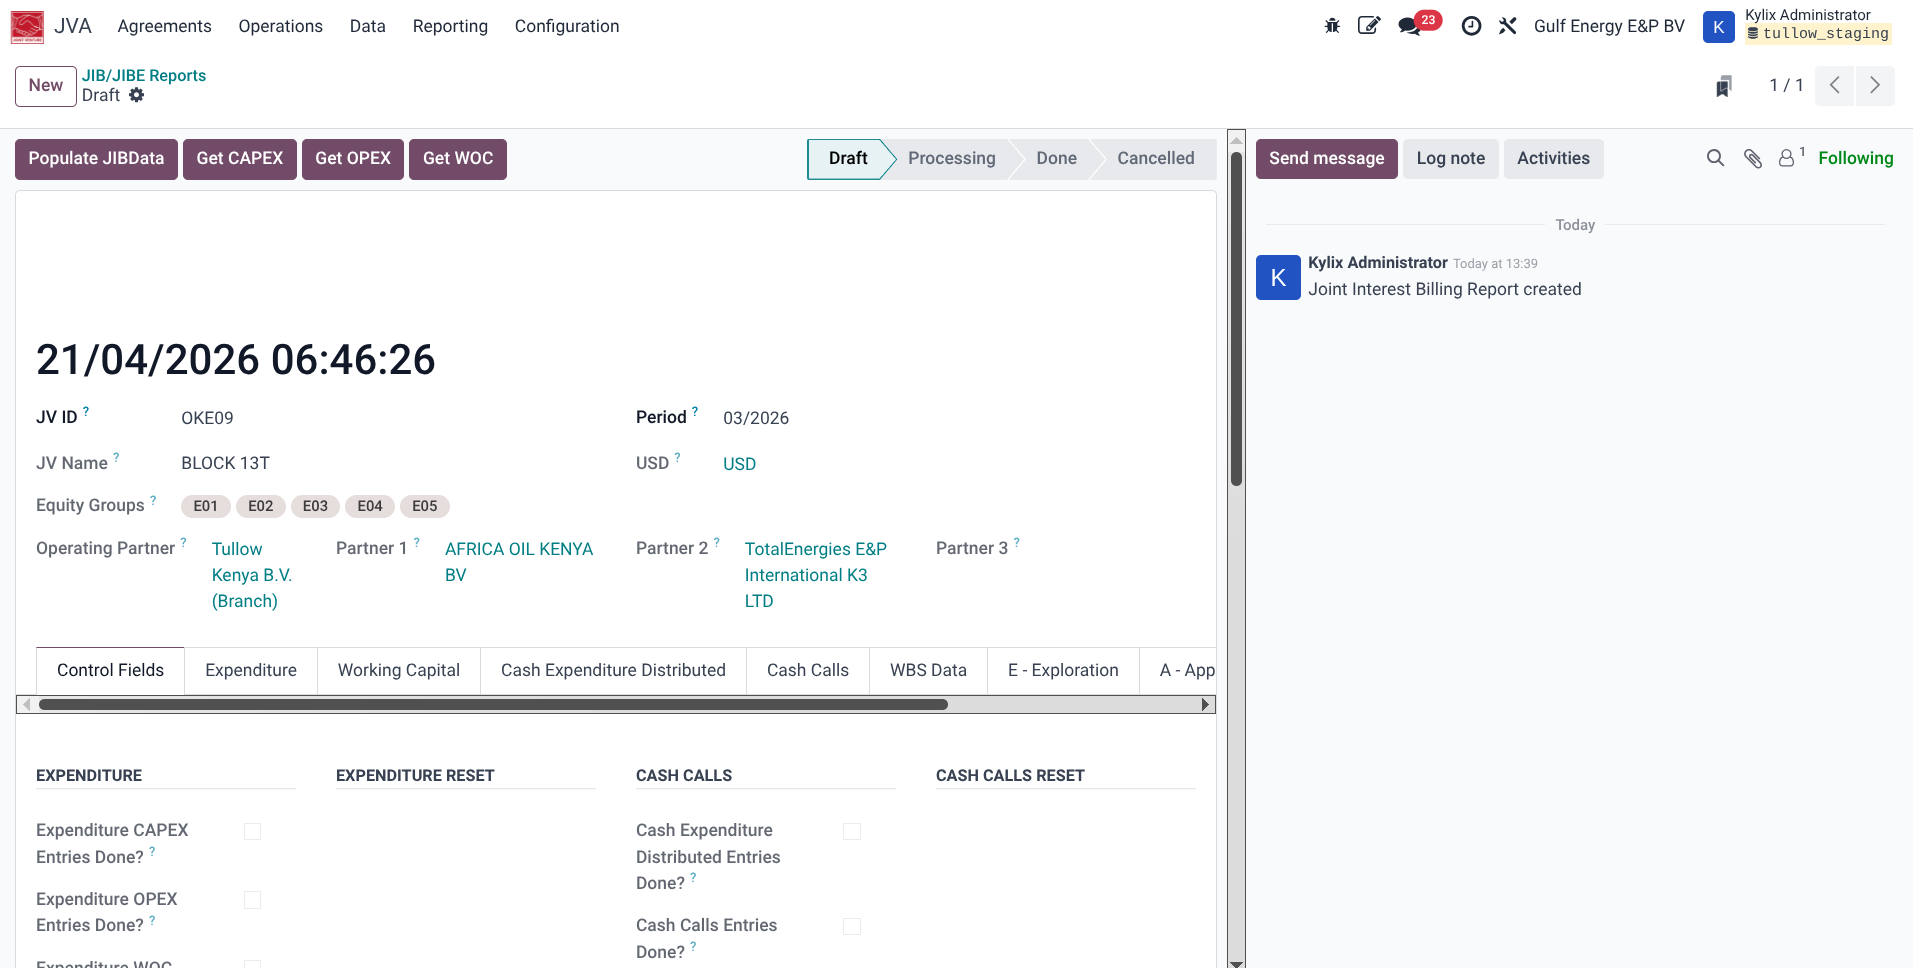
- Once this is completed, a timed confirmation will appear on the top right and close within a few seconds and the Populate JibData button should disappear, the field 'OP JibData Exists?' on the Control fields section should be ticked. The report should also move state from Draft to Processing
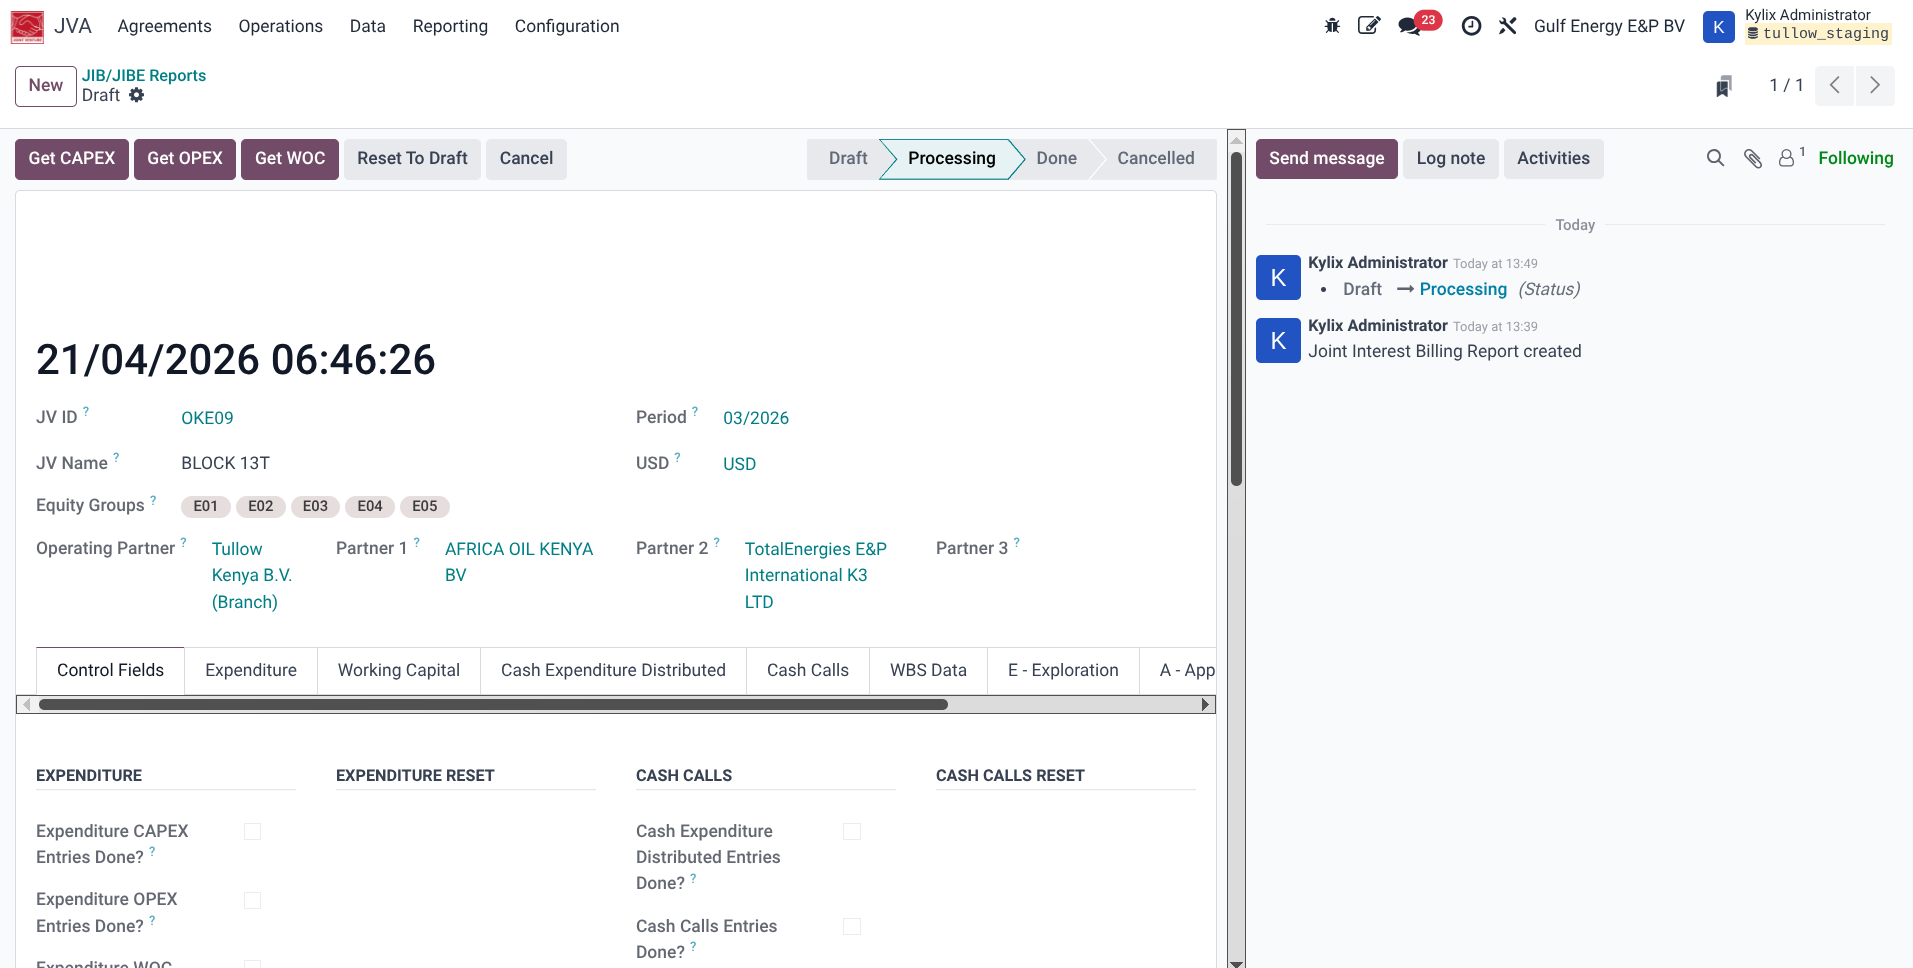
- Next click the three buttons Get CAPEX, Get OPEX and Get WOC in that order to generate the 3 sections of data. Each button will take time to get the data so patiently wait for each to complete. Each button wil also mark a tick on the corresponding Control fields sections and additionally activate reset buttons on the control fields section under Expenditure Reset.
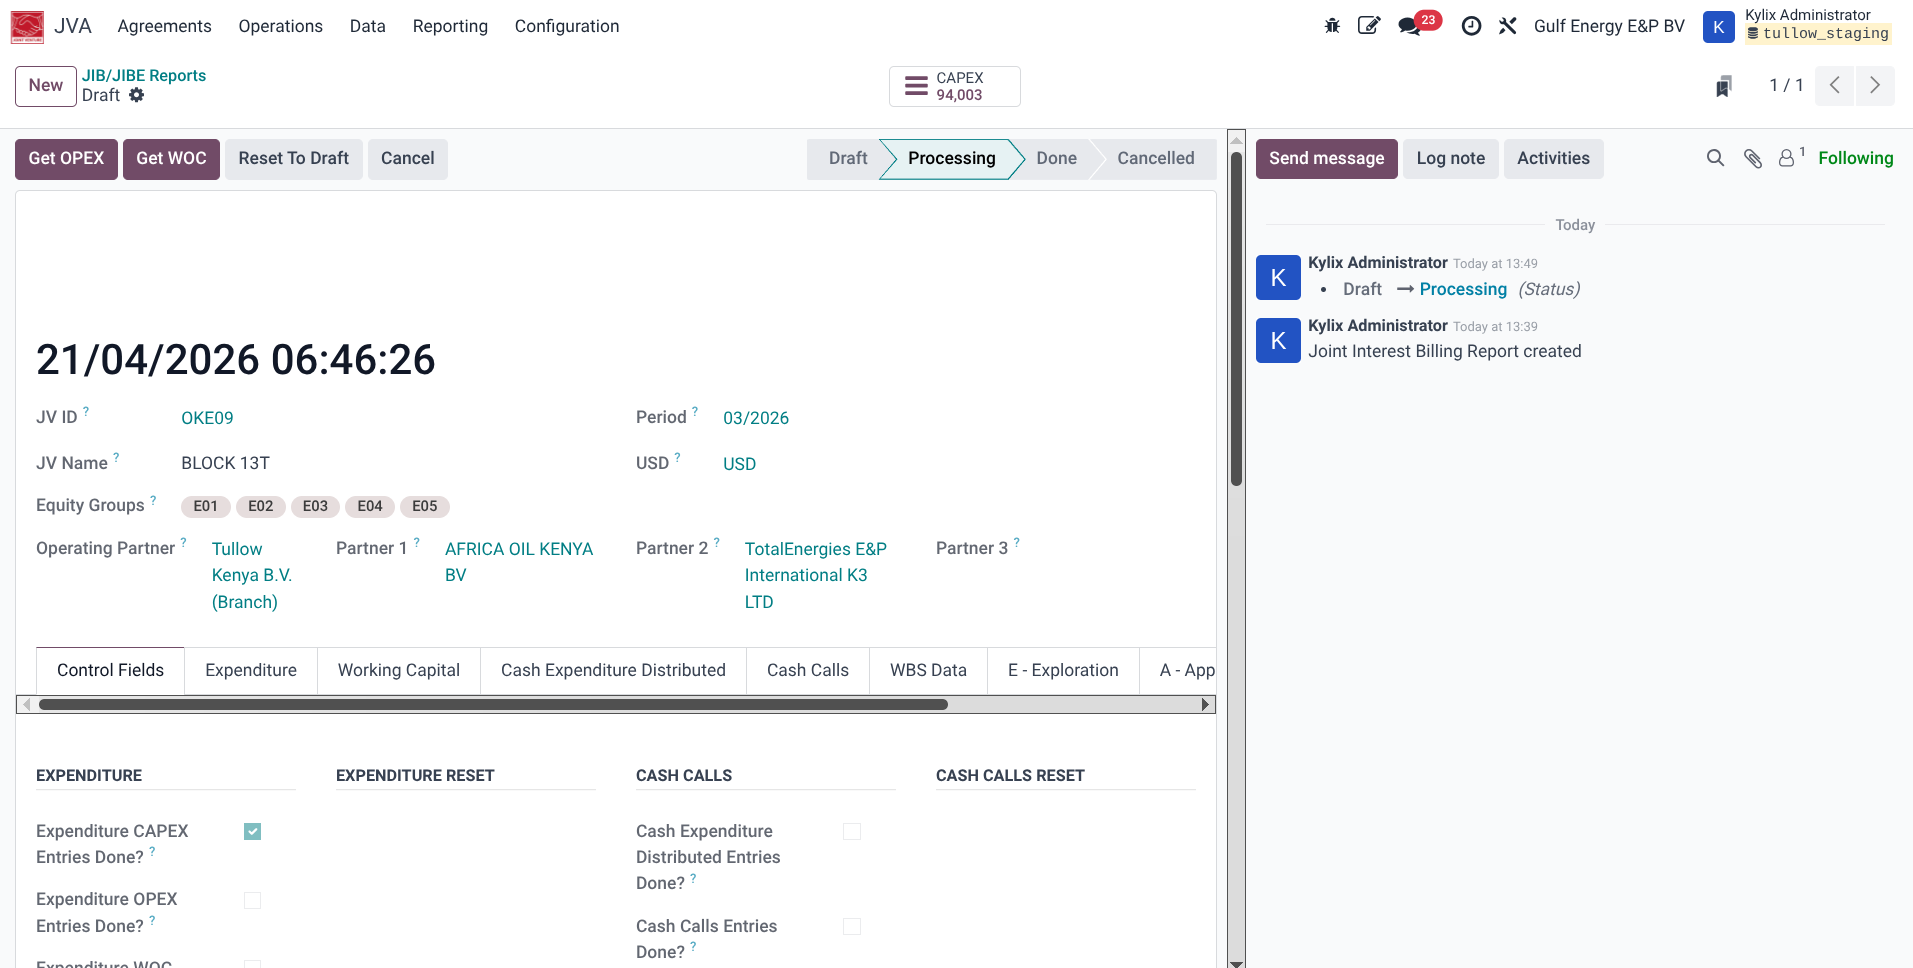
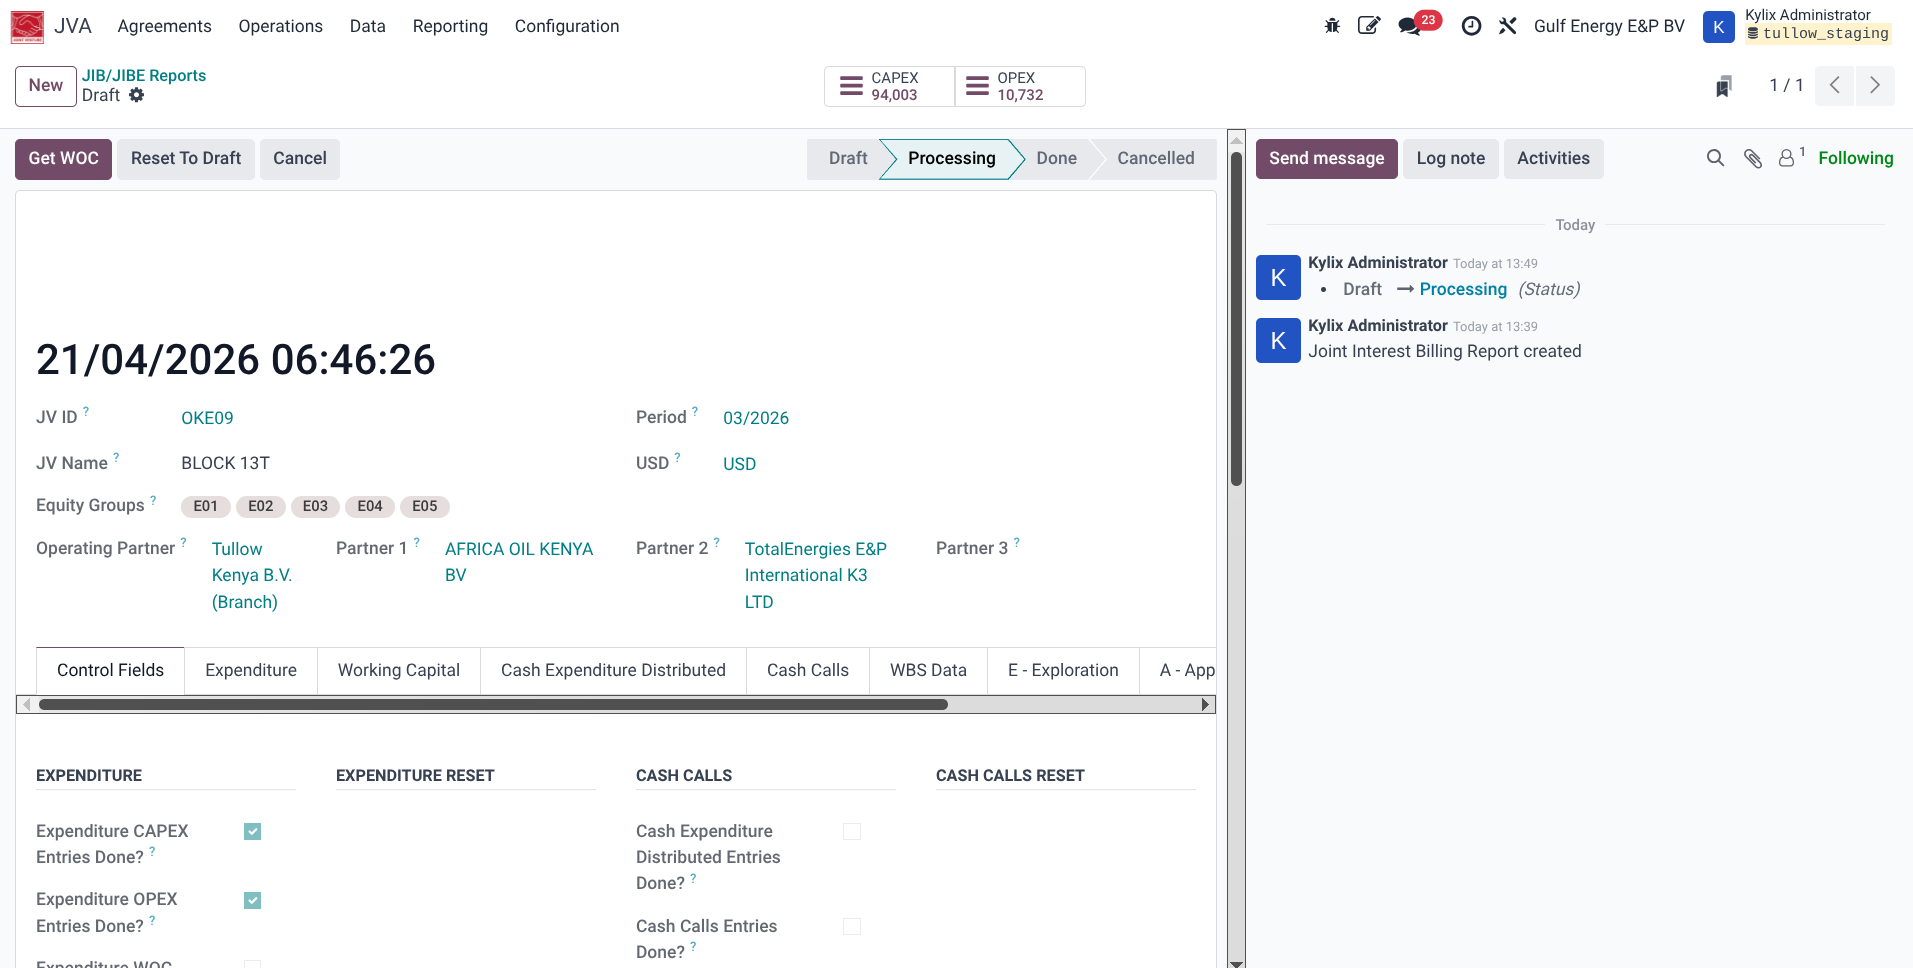
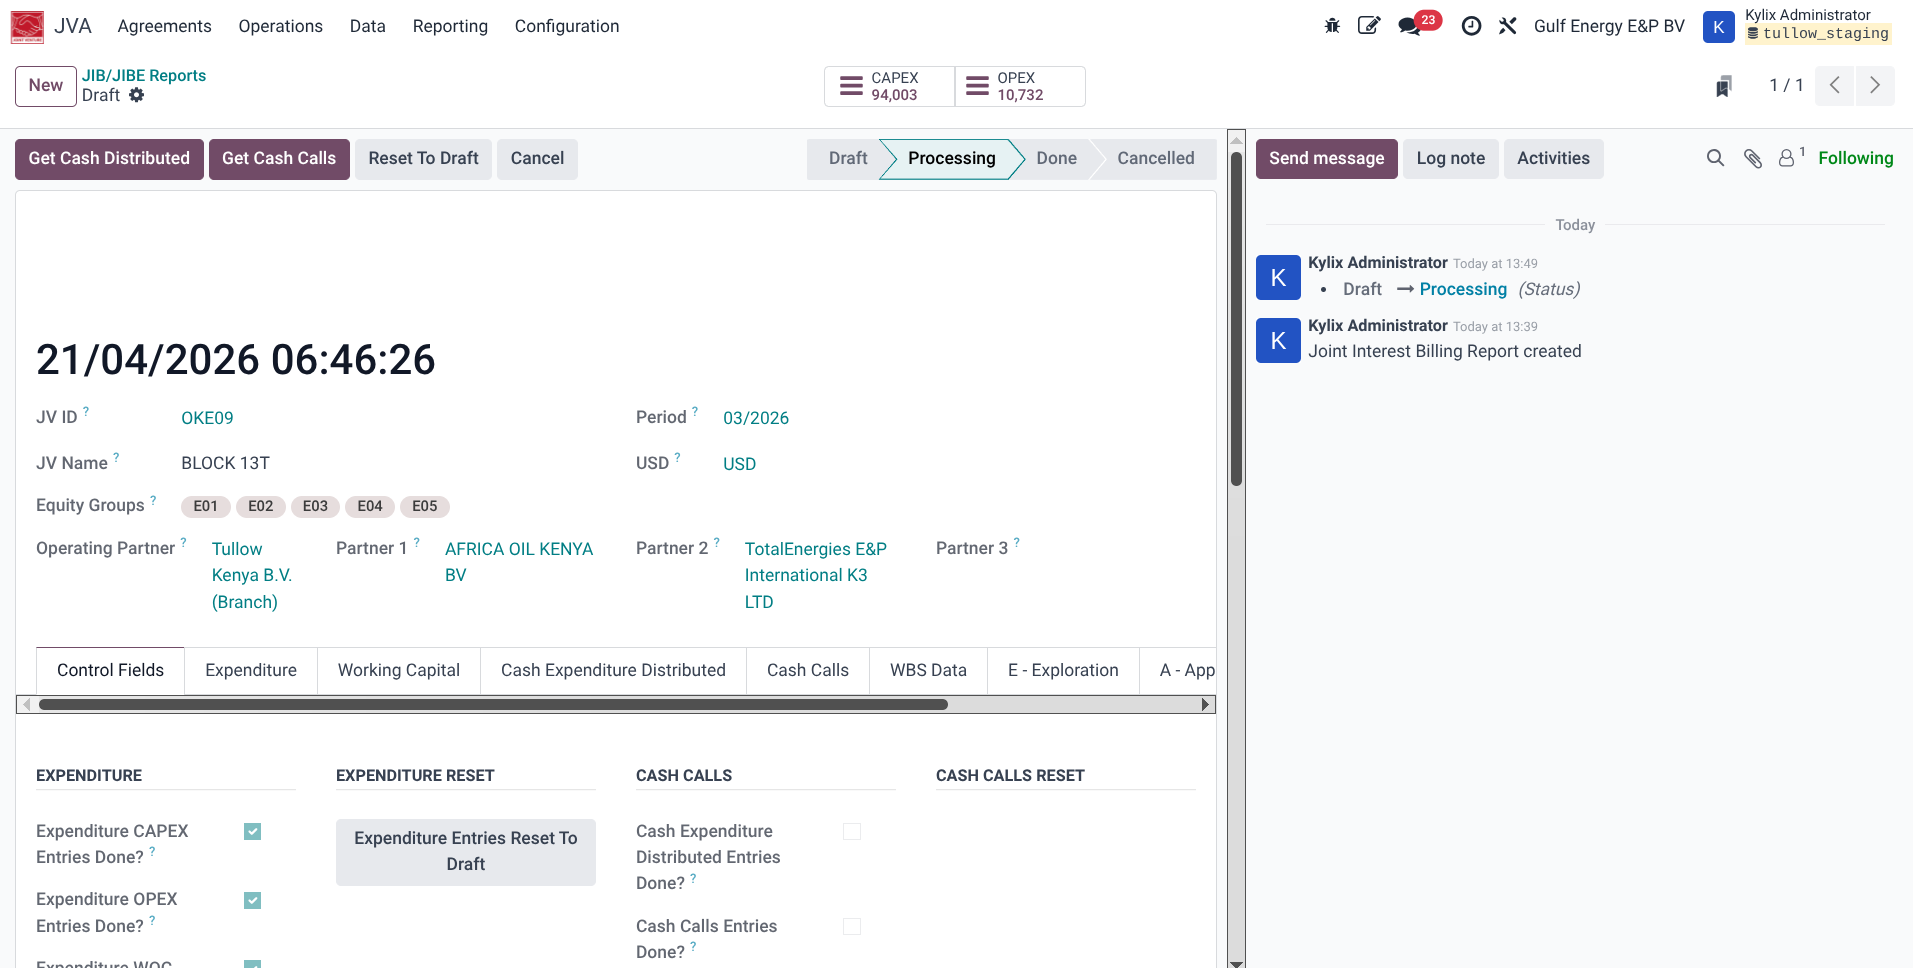
- Once the section is completed, the buttons will be replaced with the buttons for the next section, thats Get Cash Distributed and Get Cash Calls buttons. Click each of the buttons in the appearance order. Each button will take time to get the data so patiently wait for each to complete. Each button wil also mark a tick on the corresponding Control fields sections and additionally activate reset buttons on the control fields section under Cash Calls Reset
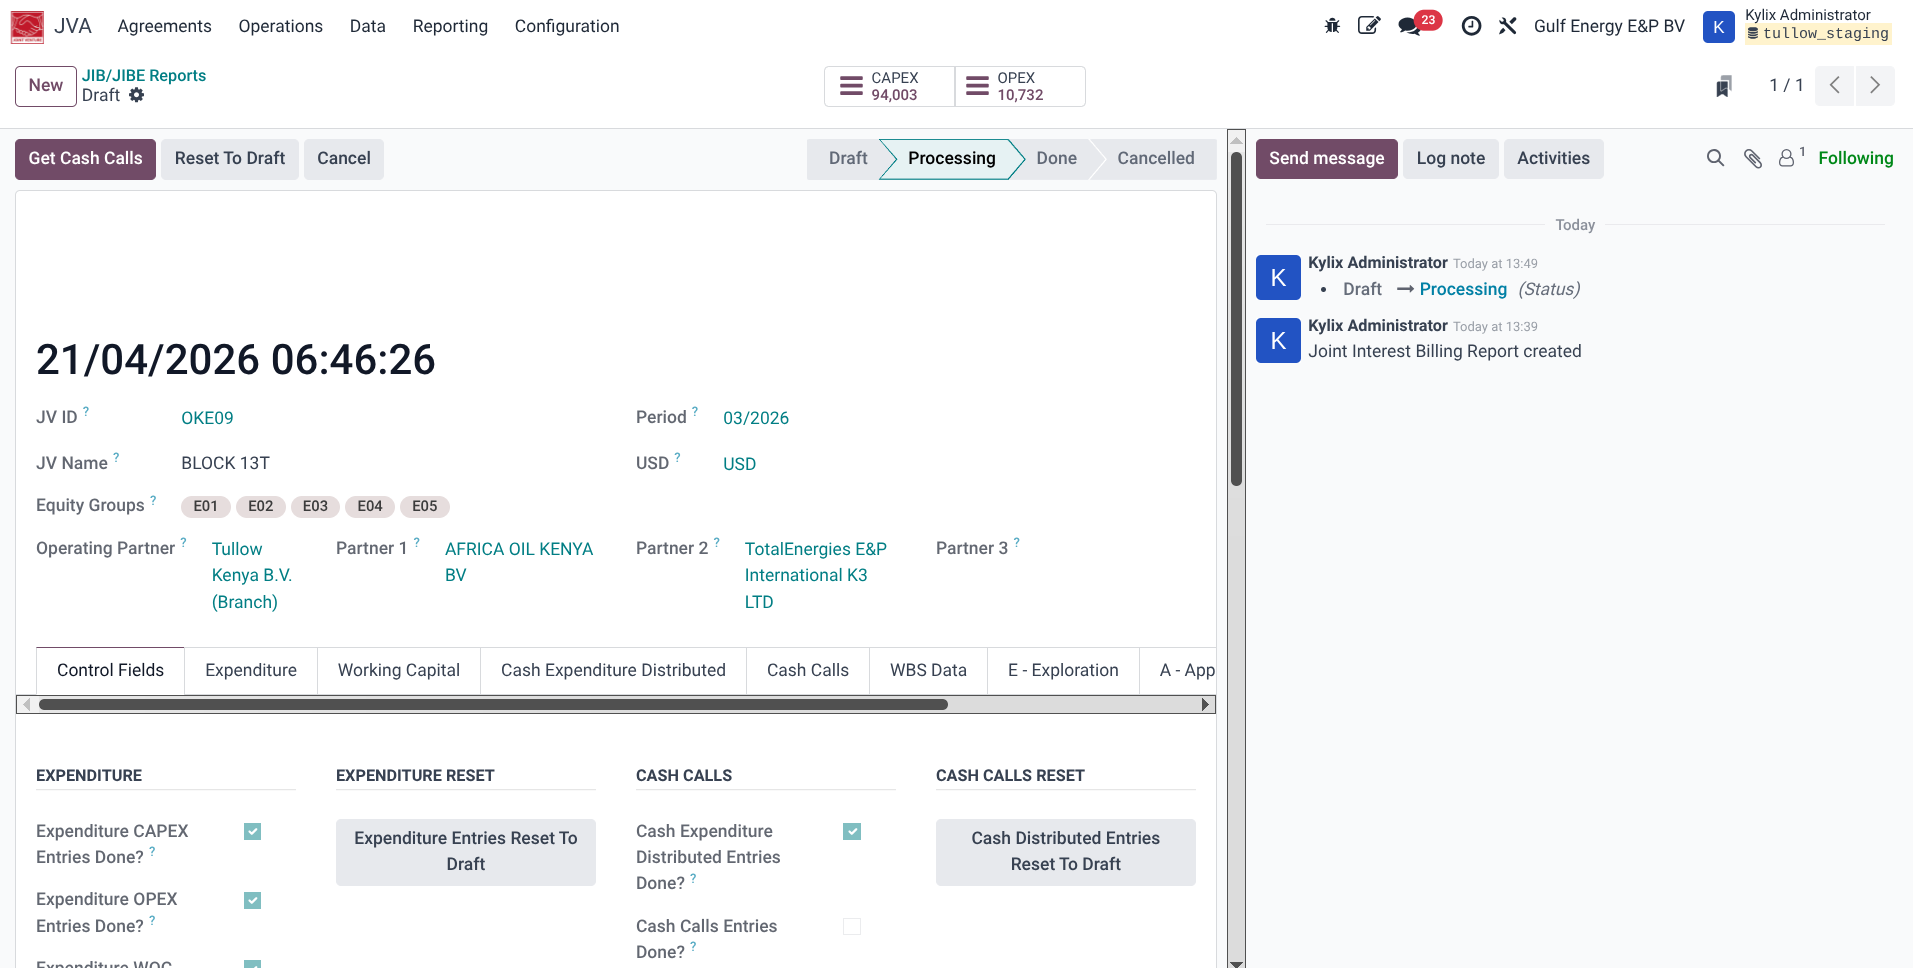
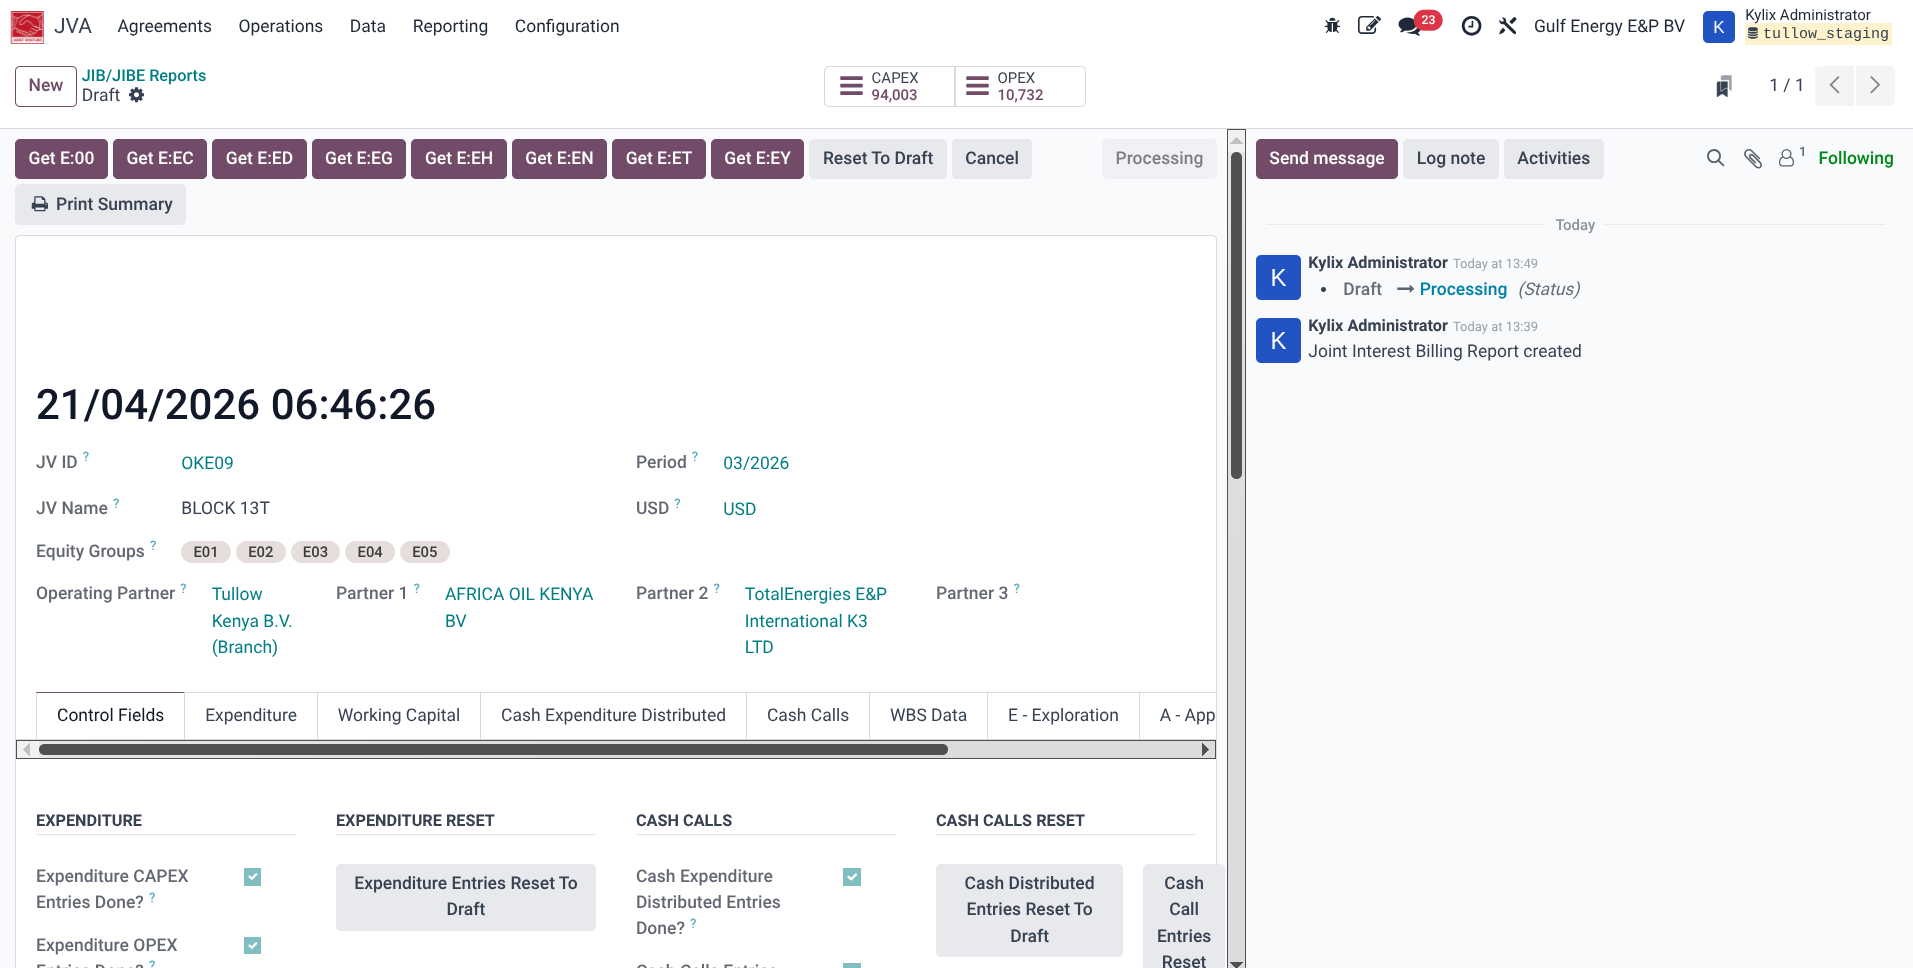
- After this, the Print Summary button is available as the summary reports are available and can be printed at this stage.
- Once the Cash Calls section is completed, the buttons will be replaced with the buttons for the next section, thats Get Explorations buttons (Get E.00, Get E.EC, etc). Click each of the buttons in the appearance order. Each button will take time to get the data so patiently wait for each to complete. Each button wil also mark a tick on the corresponding Control fields sections and additionally activate reset buttons on the control fields section under Exploration Reset
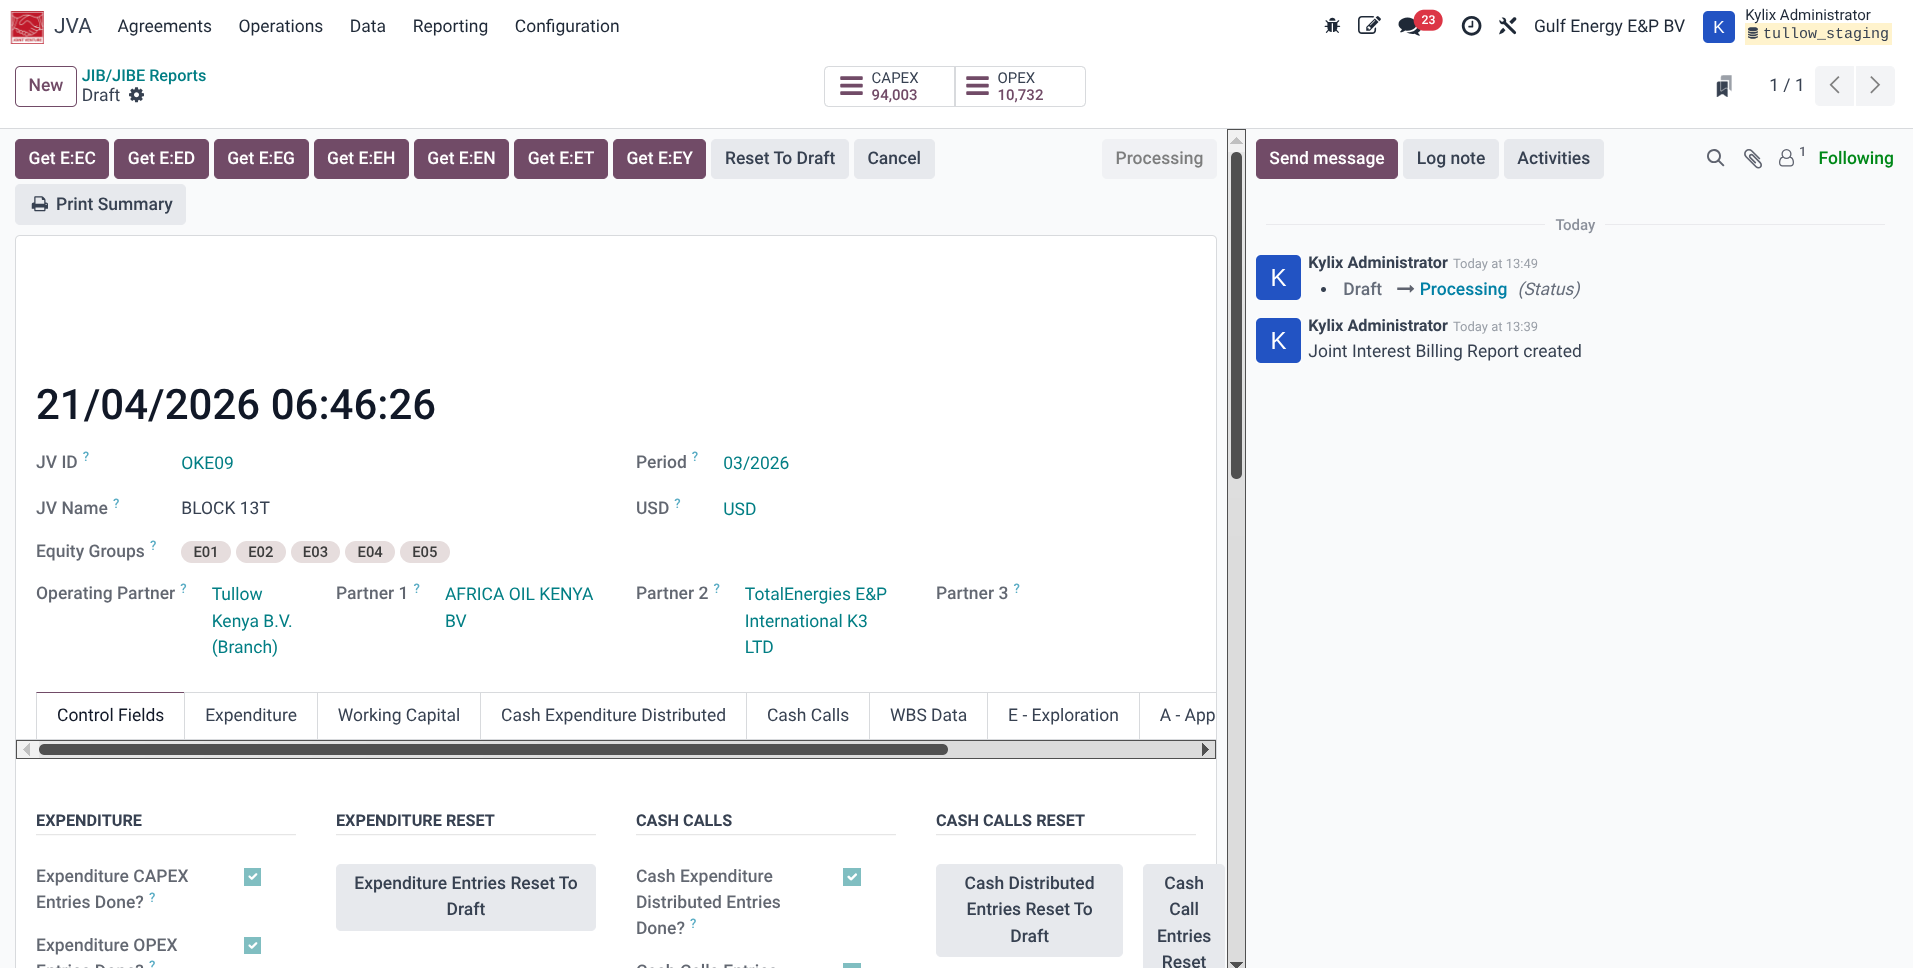
- It is important to allow each button to fully complete its data before clicking the next button. To verify, always check the Control Fields section to see if the field corresponding to the button has been ticked and the reset button is available. Here shown is the screenshot of the Control Fields section after clicking the Get E:00 button and allowing it to process and complete data
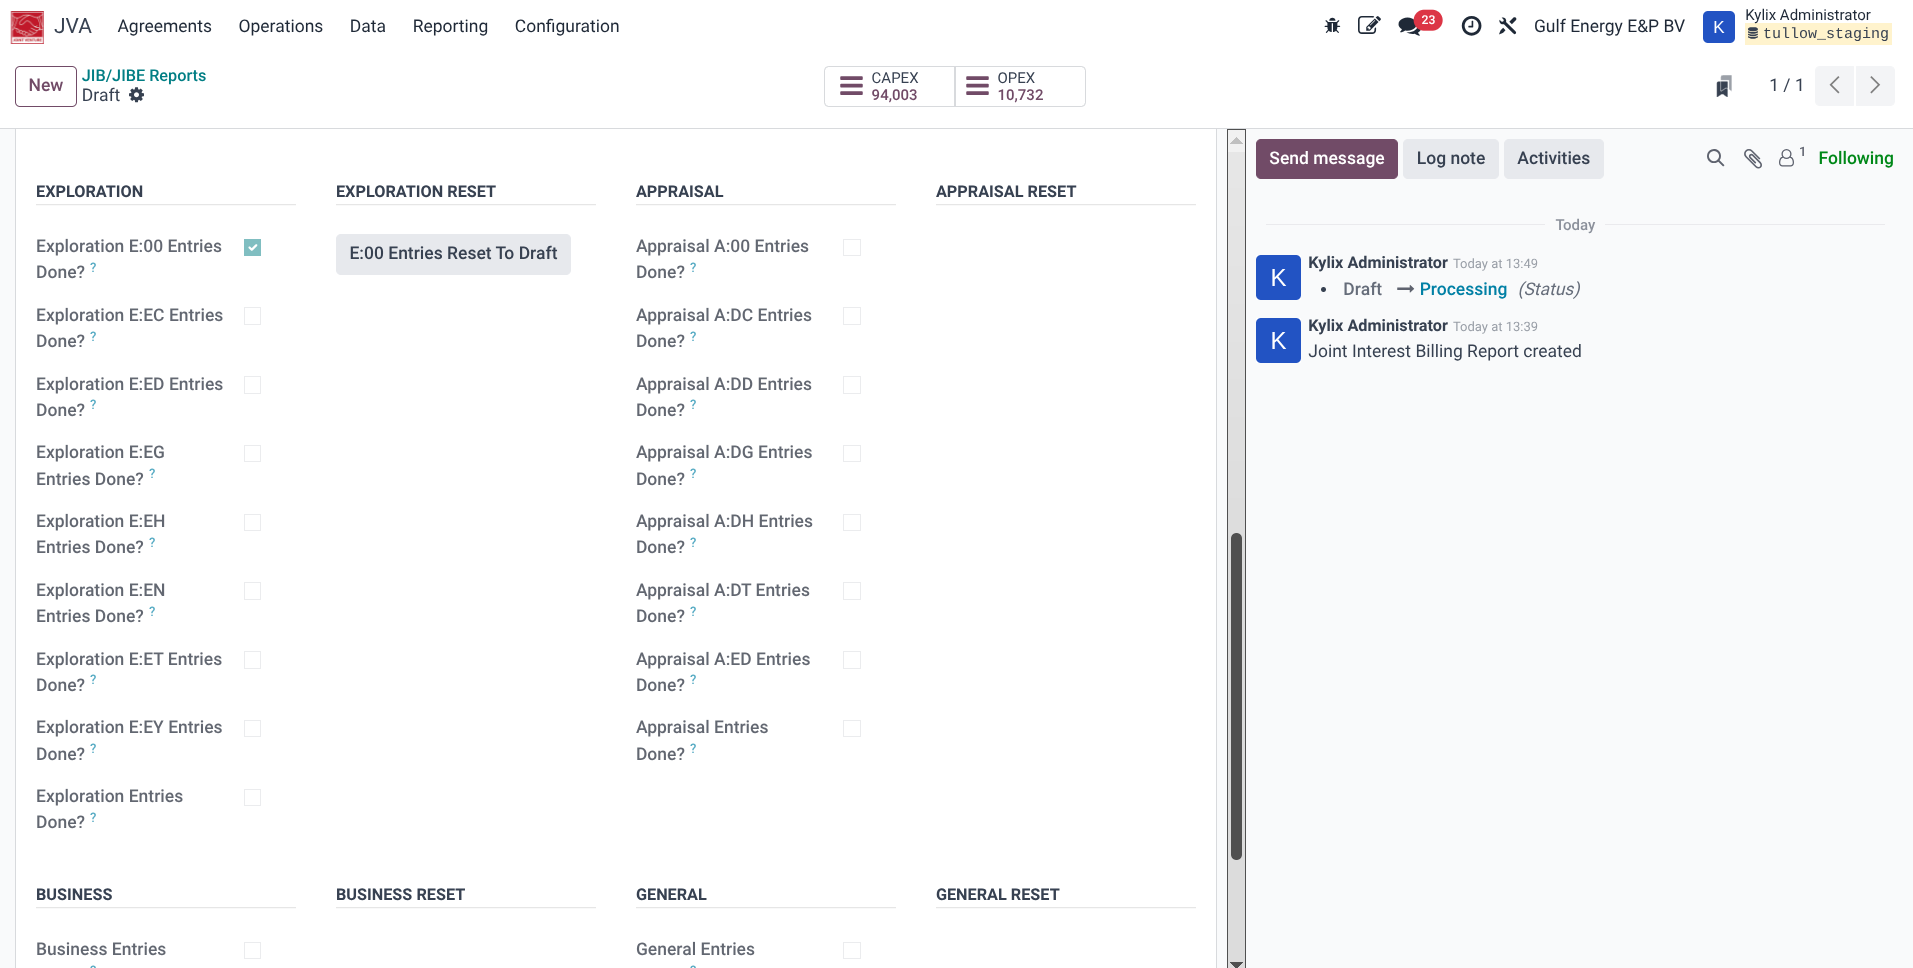
- Once the Exploration section is completed, the buttons will be replaced with the buttons for the next section, thats Appraisal buttons (Get A.00, Get A.EC, etc). Click each of the buttons in the appearance order. Each button will take time to get the data so patiently wait for each to complete. Each button will also mark a tick on the corresponding Control fields sections and additionally activate reset buttons on the control fields section under Appraisal Reset
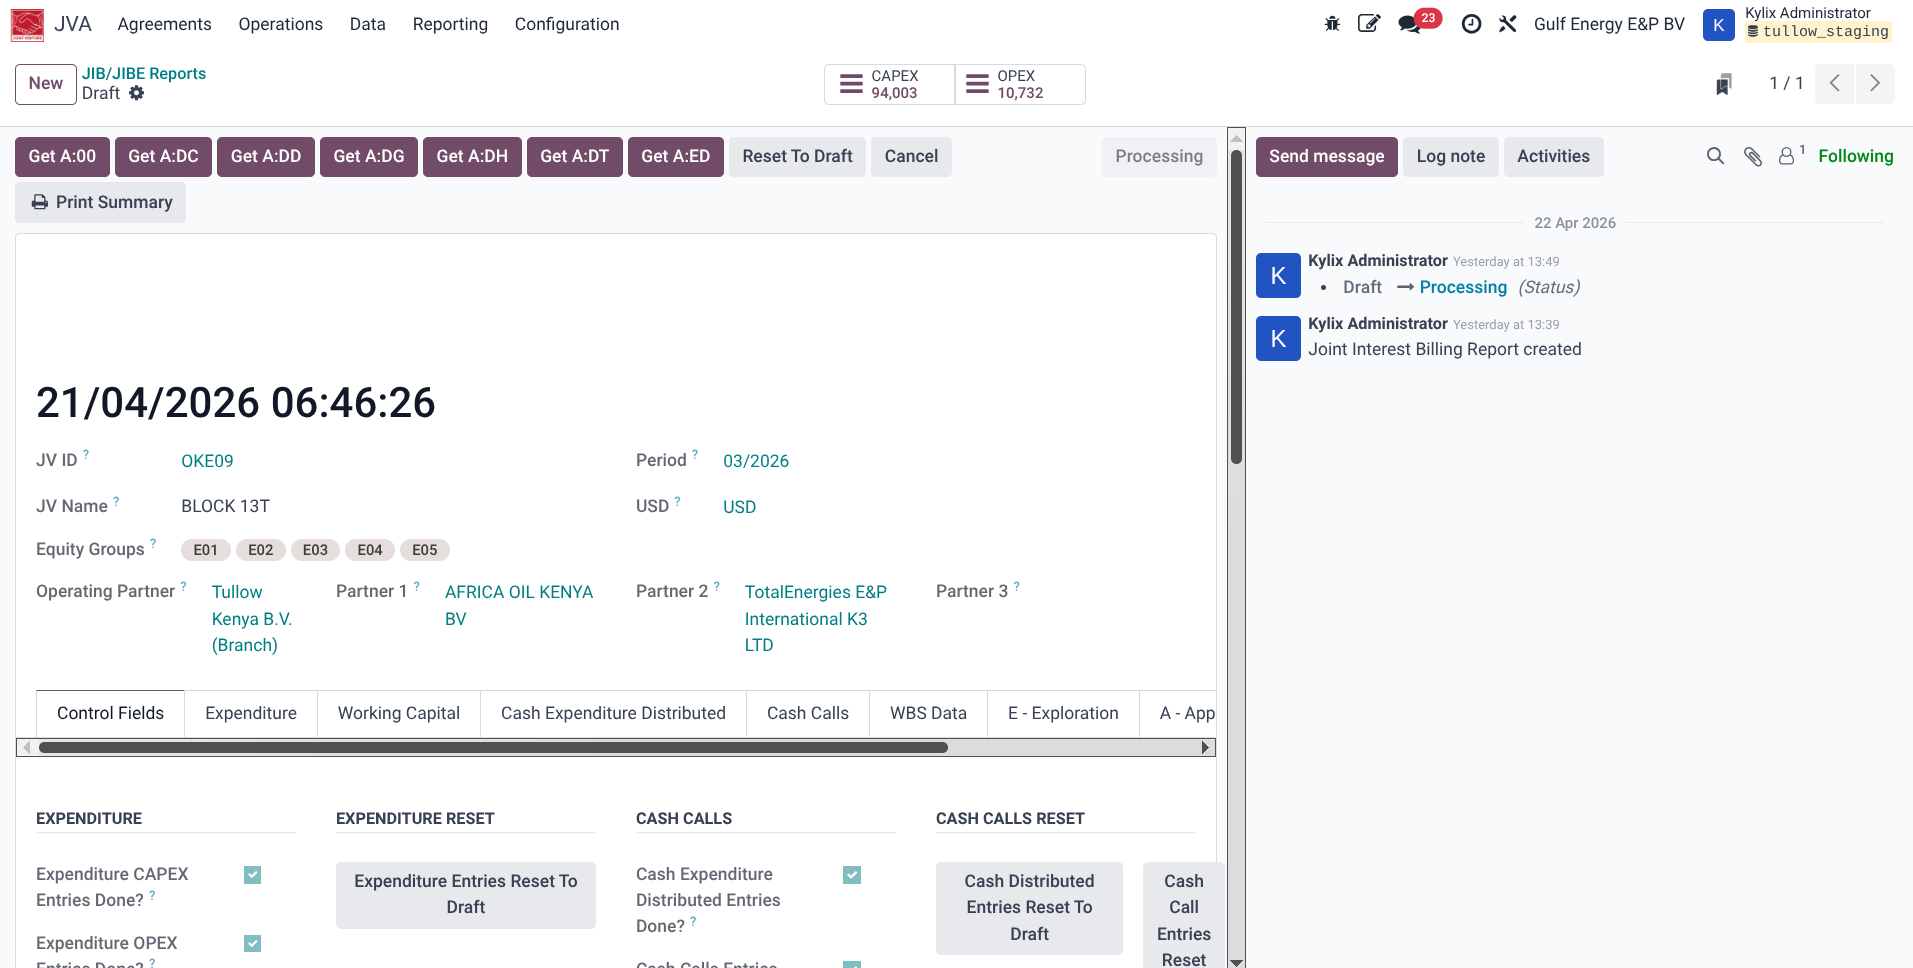
- Once the Appraisal section is completed, the buttons will be replaced with the button for the next section, that is Get Business button. Click the button to generate data for the Business Development phase section. The button will take time to get the data so patiently wait for it to complete. On completion, the button will mark a tick on the corresponding Control fields sections and additionally activate reset button on the control fields section under Business Reset
- Once the Business section is completed, the button will be replaced with the button for the next section, that is Get General button. Click the button to generate data for the General phase section. The button will take time to get the data so patiently wait for it to complete. On completion, the button will mark a tick on the corresponding Control fields sections and additionally activate reset button on the control fields section under General Reset
- Once all data is populated, click the Confirm button to lock the report and move state to Done. Any report printed before the state is set to done will have the name 'draft' on it's printout and this step is what
- The detailed report should now be fully populated and the individual partner reports can be downloaded by clicking the setting (wheel button) on the Print menu for the Operating partner and each of the other partners.

Cash Call to Partner Process
1.Log in to an ERP system with access to JVA Module
2.Navigate to JVA -Operations -partner Cash call
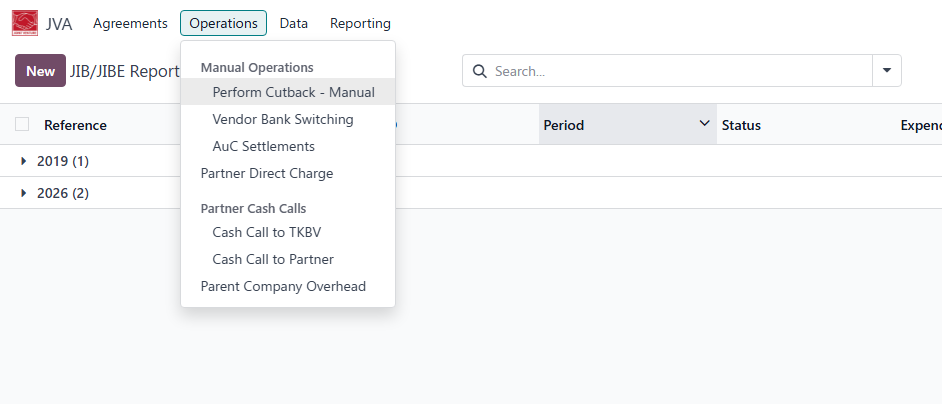 3. Click on new
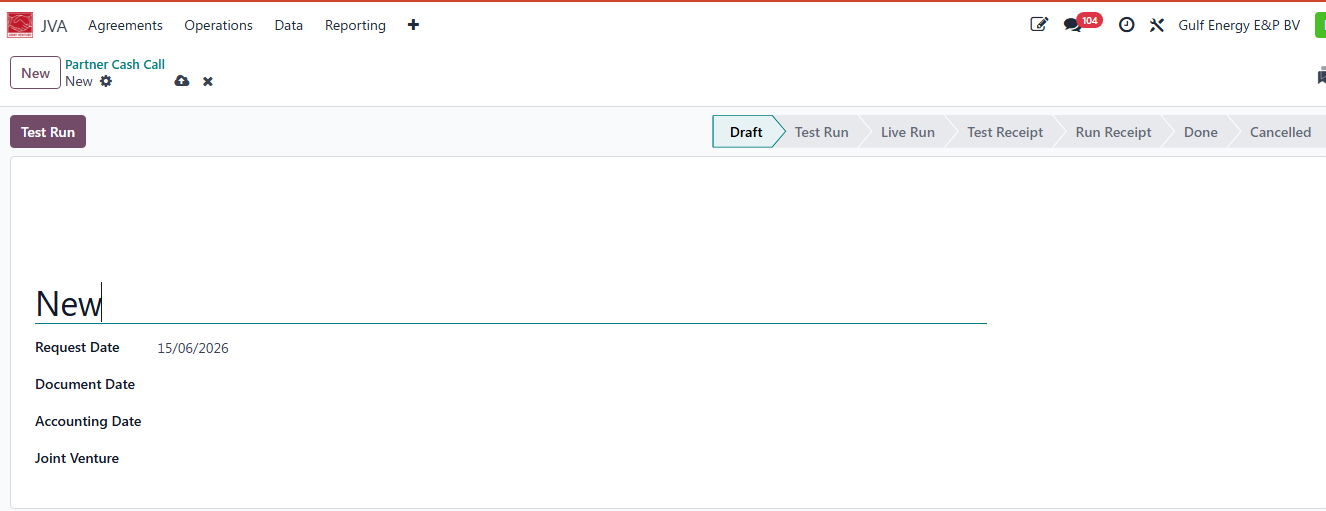
4.Fill in the fields
The Partner Cash Call screen is used to initiate and manage cash call requests within a Joint Venture (JV) environment. A cash call is a request made to partners to contribute funds for planned operational or project expenditures.
The Request Date specifies the date on which the cash call request is created. It serves as the official date of the request and is used for tracking and reporting purposes.
The Document Date represents the date assigned to the cash call document. This date is used as the reference date for the transaction and may be used when generating accounting or partner-related records.
The Accounting Date determines the financial period in which the cash call transaction will be recognized. Any accounting entries generated from the cash call will be posted using this date.
The Joint Venture field identifies the Joint Venture to which the cash call relates. The selected Joint Venture determines the participating partners, ownership percentages, and accounting rules that will be applied during the cash call process.
5.Click on test run
6. Prepare and run all the stages.Until Done.
7.On the smart buttons youre able to see
Venture Bank Switching Process
1.Log in to an ERP system with access to JVA Module
2.Navigate to JVA -Operations -Venture Bank Switching Process
3. Click on new
4.Fill in the fields 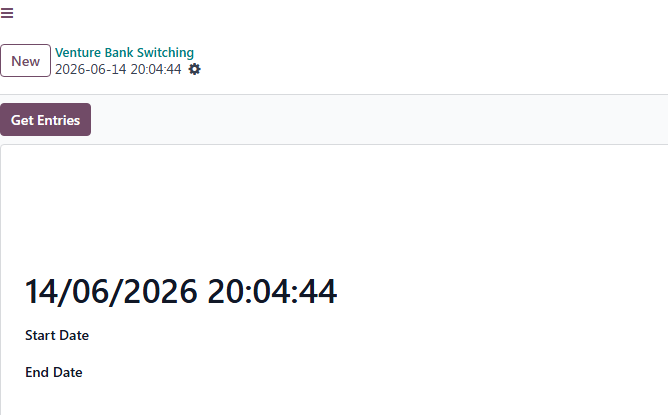
5.Click on get Entries
The Start Date field specifies the beginning date and time from which transactions will be considered for the bank switching process. All eligible transactions occurring on or after this date will be included when generating entries.
The End Date field specifies the ending date and time for the bank switching process. Transactions occurring between the Start Date and End Date will be considered when generating the switching entries.
6. Prepare and run all the stages.Until Done.
7.On the smart buttons youre able to see all the VBS Entries

AUC Settlement Process
1.Log in to an ERP system with access to JVA Module
2.Navigate to JVA -Operations -Auc settlement.
3. Click on new

4.Fill in the fields 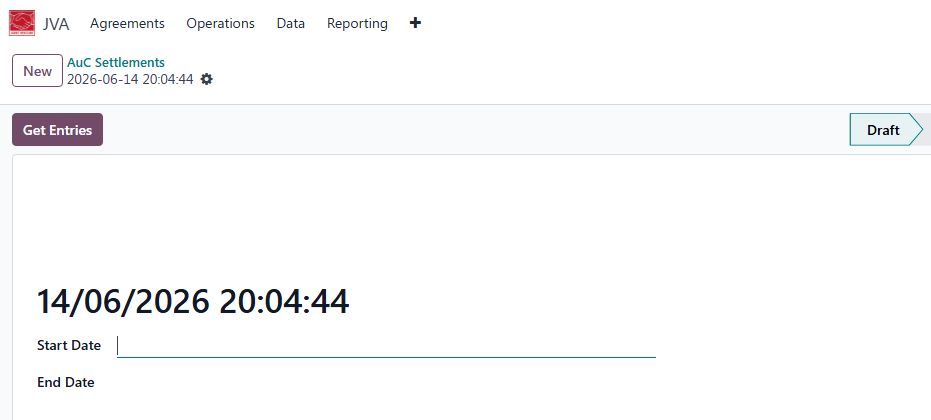
The Start Date field specifies the beginning date and time from which transactions will be considered for the AUC settlements All eligible transactions occurring on or after this date will be included when generating entries.
The End Date field specifies the ending date and time for the AUC Settlements. Transactions occurring between the Start Date and End Date will be considered when generating the settlements.
5.Click on get Entries
6. Prepare and run all the stages.Until Done.
7.On the smart buttons youre able to see all the AUC Settlemments.

Cash Call – Gulf Energy E&P B.V.
1.Log in to an ERP system with access to JVA Module
2.Navigate to JVA -Operations -cash call to TKBV
3.Click on new
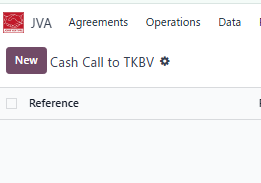
4.Fill in the fields required as follows.
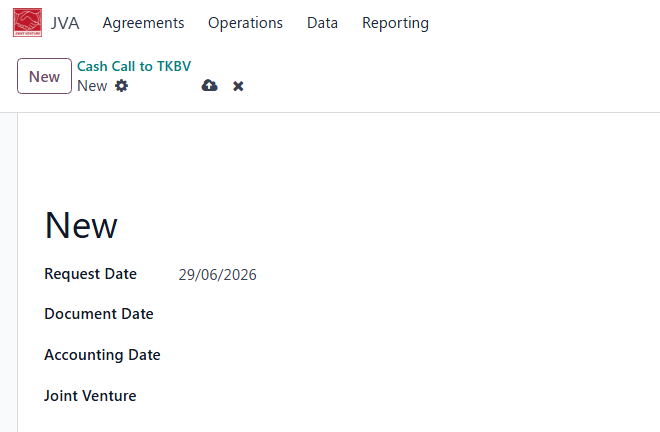
Request Date: Date the request is created in the system
Document Date: Official date of the transaction/document
Accounting Date: Date the transaction is posted to the general ledger
Joint Venture: The project or partnership the transaction is assigned to
5.Run Test all stages untill done.
Document Sign-Off
| Role | Name | Date |
| Prepared By | Martha Ondigi | __________15/05/2026 |
| Reviewed By | Joseph Okech | __________15/05/2026 |
| Approved By | ___________________ | __________ |